FO Table Views
The FO Table
An FO Table displays information about a collection of objects such as capital assets, revenue streams, loans, employees or capital projects. In addition to viewing the data, and if permitted, the data can also be edited or imported. Many different views are possible, so the data layout can be changed to view the data in many different layouts.
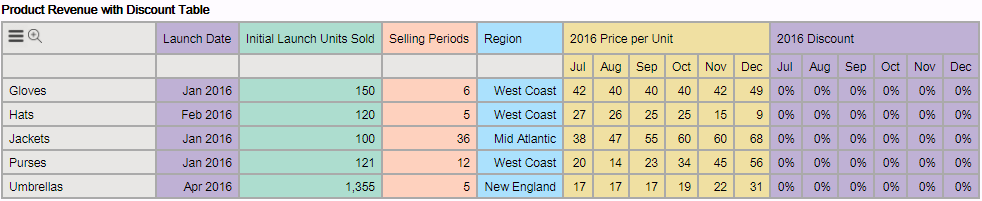
An example FO Table is shown below. The FOs are displayed in rows with the FO title in the first column. FO Table elements are displayed in columns, with the first 3 columns for FO Type parameters, the fourth column, "Region" is an FO Attribute, and the final 12 columns are Value Layers for two different FO line items. If editable, table values can be edited by clicking on the cell. When editing an FO Table, the Save/Cancel buttons light up on the table and will also appear in the navigation bar containing the name of the FO Table being edited. The 3-bar icon in the upper left corner pops up the FO Table popup menu.
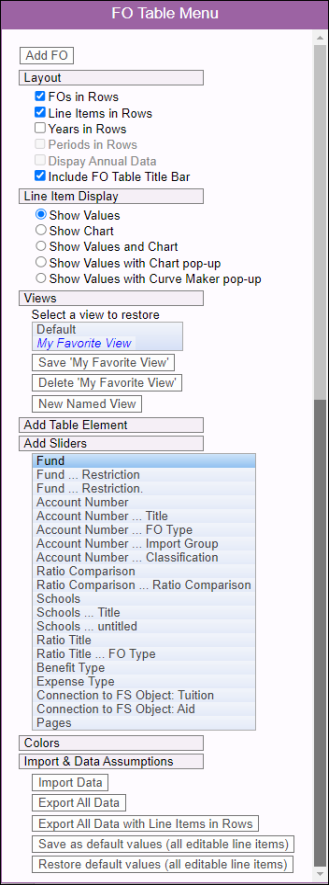
The FO Table pop-up menu
The FO Table pop-up menu provides access to a variety of operations. Some items may be grayed out if not applicable (e.g. if the table currently has less than 2 line items).
Add FO - If permitted, this button will add a new FO to the group and display it as "untitled" in the table.
Expandable groups further organize the options that can be chosen (see screen shot example below with many groups expanded to show options).
- Layout: Defines how columns and rows are used and displayed. Options are "FOs in Rows", "Line Items in Rows", "Years in Rows", "Periods in Rows", "Display Annual Data", and "Include FO table Title Bar" (on by default). A Layout can be further customized (e.g. reordering columns or rows. See the FO Table Operations section below.
- Line Item Display: Options to display additional information when clicking into a line item: "Show Values" only (default selection), "Show Chart", "Show Values and Chart", "Show Values with Chart pop-up", and "Show Values with Curve Maker pop-up".
- Views: The current layout of the FO Table can be changed by selecting a different saved view. The selected view will be remembered until a different view is chosen. Views can be named and saved in Edit Mode.
- Add Table Element: Add an available table element to the view.
- Add Sliders: Ability to add a slider (based on FO Attributes or Hubs) to view subsets of the FOs. For example, if an attribute for Department is used as a slider, the only items displayed in the table will be those of the selected department.
- Colors: Provides options to color the table along either table elements, FOs or line items.
- Import & Data Assumptions: Contains options to Export and Import FO Table data. Also has options to save editable line item data entered into the FO Table as default values and to be able restore those values.
FO Table Operations
The following operations (if permitted) are available by clicking on row or column titles.
- Copy FO
- Add FO
- Delete FO
- Retitle FO
- Sort FOs Alphabetically or by Model Content Order
- Sort FOs Ascending or Descending according to Table Element values
- Precise Row or Column Move Operations to customize the FO Table Layout (e.g. "Move to First Column" or "Move after Column" > column name
- Remove or Add Table Elements
Importing and Exporting FO Table Data
Importing FO Table Data
Many users will want to import data that has been prepared in a spreadsheet like Excel or Google Sheets. This can be new FO Table Data or an update to existing FO Table Data usually by first doing an export (see below). Line Items to be imported can appear in rows or columns. When in columns, Line Items may have any number of blank columns following them to accommodate any number of periods of line item data. The FO Table import operation is found in the FO Table 3-bar Menu under Import & Data Assumptions. Copy the data to be imported from the spreadsheet. If FO Table Dta was first exported from the FO Table, be sure to exclude the first line when marking data to copy. Click the "Import Data" button for the import popup and paste in the data. Select the appropriate Import Data Identities the FO Table import dialogue by clicking the "Import Data" button in the FO Table menu.
FO Table Imports are a bit simpler than the Data Store Imports or FO Set Imports because most of the information needed for an import is already provided (Overlay, Group, FO Type, Start and End Dates, and Identity). FOs are always represented by rows in the spreadsheet file. The only missing piece (besides date format) is how to associate columns with table elements. The first row is always reserved as a column title row. Each column is identified with some table element by matching the column title with the table element title. Thus, the “Amount” line item can be used as a column title for Amount. The “Title” is reserved for the FO Title column and is typically the first column.
Exporting FO Table Data
Click the FO Table 3-bar Menu to access the FO Table Export buttons under Import & Data Assumptions. Click the "Export All Data" button for the standard export with Line Items in Columns. To export with Line Items in rows, click "Export All Data with Line Items in Rows". Once data is exported, you can copy and paste it from the export data popup to your spreadsheet. Once copied to your spreadsheet, you can change the data row values or remove data rows if applicable. You can also add more data rows. As described in the import section above, copy the spreadsheet data (with column title row) and paste it in the Import Data popup. Don’t forget that identity determines whether you can update existing FOs.
Distinguishing Table Content from Table View
The content is always stored persistently and the data is broadcast/shared to all others viewing the same data or reports based on the data. The form (how it is viewed) is strictly local and not seen by others, however views can be explicitly saved which then can be used by other users.